
 Total Watermark Software - Quick start
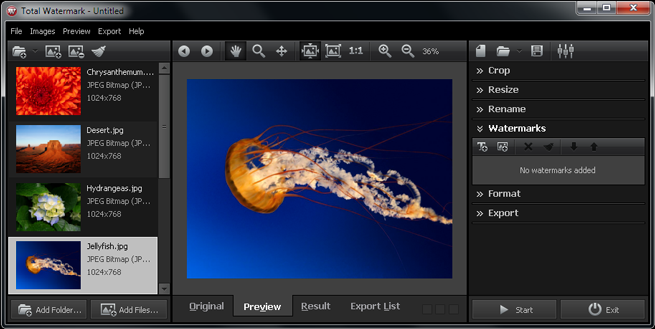
Once the application is launched, you get to its main window:

At the top of the window, you can see the menu. The further part of the window is split into three parts:
- Left - images to be processed.
- Center - preview area, as well as the list of files to be exported.
- Right - available image processing operations, presented as the respective sections.
While no images are added for processing, the preview area displays the welcome screen, where you can quickly open an earlier created template or add images from recently used folders.
Add the images we need to apply watermarks to using the "Add Folder" button (adds all images available in the selected folder) or "Add Files" (adds images selected in the dialog):
The first part of the window contains sections for various operations over the added images. All information on the operations can be saved and read from a template file using the respective buttons on the toolbar or via the respective items of the File submenu of the main menu.
Only one section at a time can be selected. Depending on the selection, the preview pane Preview shows the corresponding state of the image (the Crop section shows the source image, the Watermarks one - with applied watermarks). First it opens the Watermarks section, where you can add watermarks. The ![]() button adds a text, and the
button adds a text, and the ![]() button adds an image.
button adds an image.
Once a watermark is added, its properties dialog appears, where you can enter the text of the watermark, set its position, etc. The text can include meta data of the image (to open the submenu of adding meta data tag, use the ![]() button on the toolbar over the text field), which allows to display the most current data for the specific image. For example, the figure below demonstrates a watermark at the bottom-right corner of the window, which includes the copyright text and the year that image was created (for jpeg files, that data is retrieved from the respective EXIF section):
button on the toolbar over the text field), which allows to display the most current data for the specific image. For example, the figure below demonstrates a watermark at the bottom-right corner of the window, which includes the copyright text and the year that image was created (for jpeg files, that data is retrieved from the respective EXIF section):
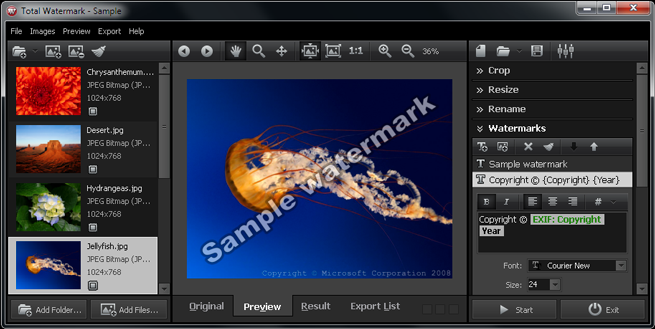
When setting up the appearance of the watermarks, you can switch the images on the list in the preview pane on the left side; the preview pane Preview displays the watermarks applied to the selected image.
Now you can start exporting the images. To do so, you can either click the Start button or select the respective item on the Export submenu of the main menu. Before the export actually starts, the program pops the presets window:
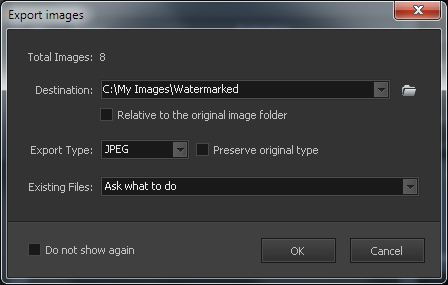
All the parameters, editable in this window, can also be set in the Format and Export sections, which can later be saved in a template file. Here you can quickly edit the path and format of the files to be exported. If all the settings are fine, click OK, and that starts the export process. The preview pane switches to the Export List tab, where you can watch the progress:
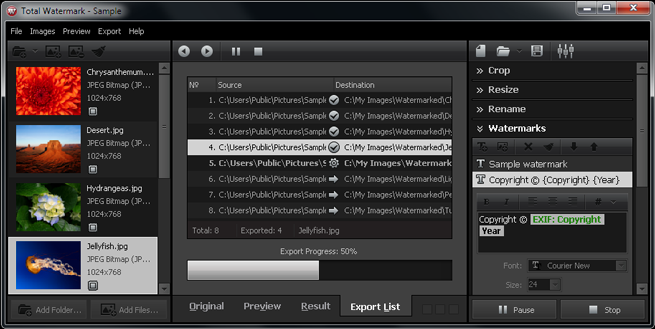
The image being currently processed is marked with the ![]() icon, already exported - with
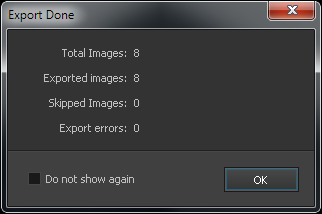
icon, already exported - with ![]() . Once the export is over, the program brings up the window with the results:
. Once the export is over, the program brings up the window with the results:
Done!
Notes
Do you like our product? You have an opportunity to get a FREE license of our product now! Translate our product into your language. For more details, please contact us.